

Score
Shown in heatmap tooltips and the Weight Distribution → Score view. The BigDipperOptions score is a composite of strike-level inputs—including implied volatility (IV), open interest, gamma / GEX, volume, and more. It is designed to simplify research: compare strikes here without sorting raw broker columns one by one.- Higher values → more combined positioning and participation at that strike/expiry
- Step 1: screen with score, GEX, and filters on BigDipperOptions
- Step 2: confirm live IV, IV Rank, and quotes at your brokerage before trading
- Experimental—relative insight only
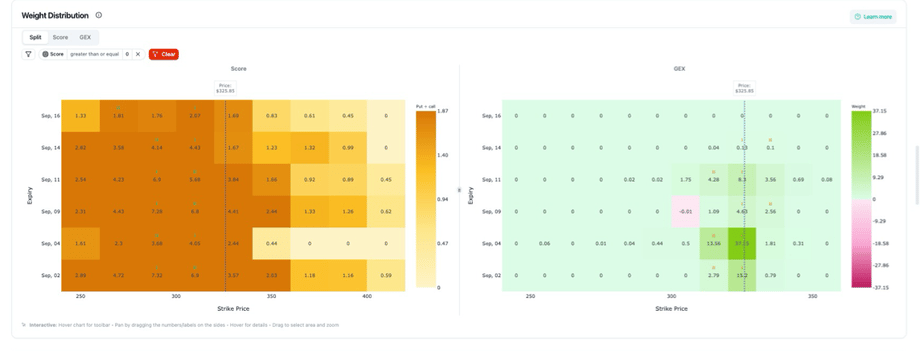
Call Wall
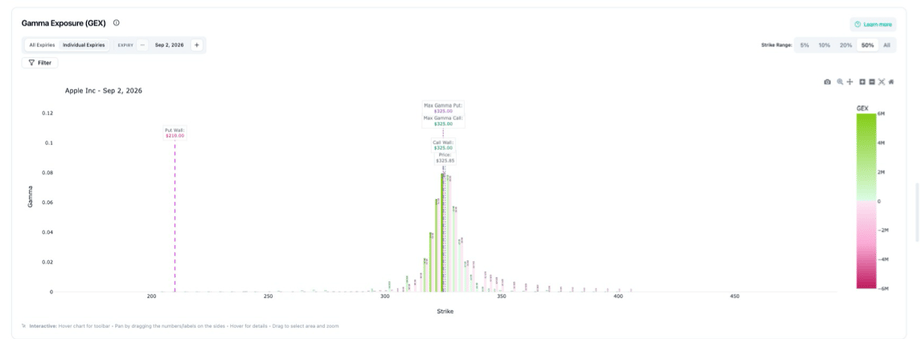
On-chart label:Call Wall (GEX section)
The strike with the largest call-side GEX concentration for the selected expiry.
- Often discussed as resistance or an upside zone
- Not a guaranteed reversal—research context only
Max Gamma Call
On-chart label:Max Gamma Call
The call strike with peak gamma for that expiry.
- More sensitive to small price moves
- Hedging can be more active here—income strategies often treat this as a hotspot
Max Gamma Put
On-chart label:Max Gamma Put
The put strike with peak gamma for that expiry.
- Same sensitivity idea on the put side
- Useful when screening cash-secured put levels for the Wheel
Price (spot)
On-chart label:Price
Current underlying level on the GEX chart—compare walls and max gamma relative to spot.
Put Wall
Put walls may appear on other GEX views or chain documentation; on this report the call side is labeled Call Wall on the bar chart. For put-side concentration, read pink put bars and GEX Weight Distribution.How metrics work together
Always pair with Delayed Data Disclaimer—prices on charts are delayed; confirm live underlying, strike, and option premium at your broker before any order.